A Tweet Happy Birthday for Susan

Friday, July 31, 2015


Today is a very special day! It's time to do the BIRTHDAY DANCE and celebrate with Susan McShirley!

A group of us crafty peeps have gotten together to make her cards and do a little Birthday hop. 

If you get lost you can view the participants at the end of this blog post. Be sure to check them out!

Here's the card that I made for her. I'm also sending her a special gift to go along with this. (It's a surprise so keep checking your mailbox Susan!!!)


Susan is the SWEET owner of SRM Stickers. I have had the honor and pleasure to design for her and her awesome company.

I can honestly say that she is one of the most genuine and sweetest people in the craft industry. 

The inspiration for my card came from this sticker set. It's one of my FAVE products in the SRM Store. It's called Stickers by the dozen - Birthday Birdie

That little birdie is just so darn cute!


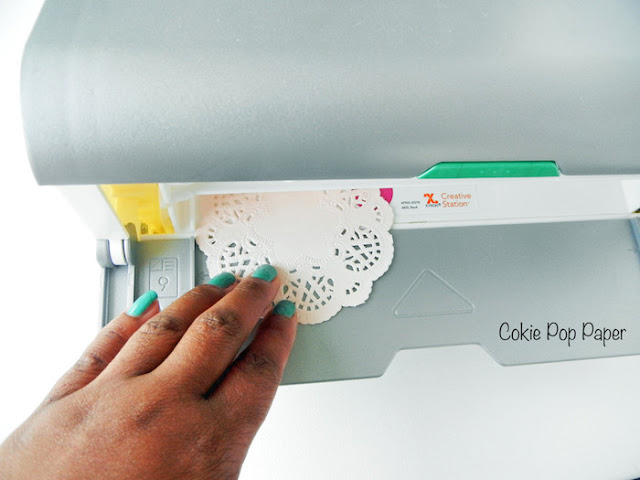
My card was so fun to make. The birdie came from gift wrap. Instead of throwing it away, I decided to recycle it and use it on the card. I added a small staple under the wing to keep it secure.


I added some circle elements, paint splatter and sequins too. The birthday sentiment is from the same sticker set.

I hope your day is a HAPPY one Susan! 


Here are the participating blogs. Be sure to click on each name to be directed to their blog. You will love the crafty inspiration!


Party in a Box with Xyron

Thursday, July 30, 2015

It's time to party! This time I'm celebrating with TRIANGLES!

I have never used this shape for a craft project before, but I'm glad that I discovered the DCWV Favor Box stack. It's full of decorative paper and templates for a variety of party boxes.

And of course I'm using my Xyron Creative Station to pull it all together!

Here's what I came up with!


Here are some easy instructions to make your own!

1. There are loads of paper choices in the DCWV Favor Box stack. Select your fave color and the box template that you want to use. Simply cut out the template and use it as a guide to cut your paper.


2. Use your template as a guide to score and fold the paper. 


3. Flatten the shape and run it through the Xyron Creative Station. Use the score lines as a guide to put your triangle box together. You can simply leave the box empty to use as party table decor. Another option is to fill it with candy after you run it through the Creative Station. 


4. Just remove the top film. The back of your paper will be full of adhesive. 


5. Once your box is put together you will notice a small opening in the top of your triangle box. Place a photo stick pin into that opening. 


6. Place the ends of your colorful shredded paper into the small opening too. Fluff out the shredded paper around the shape. 


7. Then add a small embellishment to the photo stick pin. Add jewels, puffy hearts, or other items to your embellishment.


Now it's time to party!!!


Here's a peek at the fun boxes that you can make with this stack.

And did you know that the Xyron Creative Station is now available at Jo-Ann's and Michael's?  It will also be available at Hobby Lobby in September. 


You Rock Gift Card Holder

Tuesday, July 28, 2015

Gift cards are my go-to idea when I'm short on time. I always find a fun way to dress them up before giving them to family and friends.

Here's my latest craft idea using new products from Fun Stamper's Journey.


I pulled out my Oatmeal cardstock and Gift Card Sleeve die to make this one. The dimensions are just right to hold a gift card from your favorite store.

I also used the Butterfly Prints die with the Summer Days cardstock. The bright color of the cardstock really adds a focal point in the middle of the gift card sleeve. The fun sentiment is from the Rock Notes stamp set.


Here's a fun tip to jazz up your Whip Cream cardstock. Grab a bottle of your Gold Silk and sprinkle on some color. It's so fun to use!


Be sure to check out the new catalog. There are loads of fun products inside!


Supplies:
Stamp: Rock Notes
Card stock: Oatmeal, Whip Cream, Summer Days
Dies - Gift card holder Sleeve, Butterfly Prints
Ink - Deep Lilac
Misc. - Journey sequins, Journey dots, Gold silk

High Top Sneaker Party with Xyron & My Favorite Things

Thursday, July 23, 2015

If you follow me on my Instagram account then you know that I LOVE Converse sneakers. I'm collecting them in every color too!

When I saw the Die-namics LLD All-Star High Top die from My Favorite Things I jumped for joy! It was the perfect thing that I needed for a fresh party favor idea. And of course I paired it with the new Xyron Creative Station to make a new project.

I'm so excited that MFT and Xyron have teamed up for a product share this week.


Here are two fun party favors that are sure to be a hit at your next celebration.

First up is a High Top Sneaker Party Favor Bag !


You can fill these SRM glassine bags with candy, popcorn, or any other kind of sweet treat for your party guests.

Next up is a Sneaker Popcorn Favor Bucket !


Wouldn't these be fun to use as party table decor? I'm sure your guests would love to take one home too!

Here's how I made them... 

First, I used a die to make the circle shape. I then used the MFT "Be Original" stamp set to add a fun greeting.


Pick out your favorite card stock colors and use the high top sneaker die set to cut out each piece. 


Then run the large piece through the new Xyron Creative Station. It provides just the right amount of adhesive for your craft projects.


I love that there is a cutter already built into the Creative Station. Just slide the blade across to easily cut off the piece that you need.


Peel off the film on the top. The back of my sneaker is filled with adhesive and ready to adhere to my circle shape.


Run the smaller pieces through the Xyron 3" Sticker Maker and add them to the larger shape to build the sneaker.


I found it easier to add the smaller lace tops once it was already on the circle. Then I held up the top of the sneaker to string twine through the shoe lace openings. 

I added a lollipop stick to the finished project. Now it's time to fill your pail with shredded paper and popcorn. The lollipop stick held up on its own without me having to add any additional adhesive. You can find the sticks at Michael's Craft Store.


Now it's time to party! I must make this the theme of my next birthday party!

Be sure to visit Xyron and My Favorite Things for more wonderful products.

My Favorite Things - http://mftstamps.com/

And here is a shot of me in my new pair of Converse sneakers!

An Awesome DIY Gift Box

Wednesday, July 22, 2015

I never ever buy gift boxes! There's no need to when you can create your own!

I've got a fun DIY gift box idea for you today using some new products from Fun Stamper's Journey!

Here's what I came up with!


The new corrugated kraft boxes are just the right size for any type of gift giving. I love that the color is neutral. It makes it easy to pair it up with colorful paper.

I used the new "Going Places Prints" paper because it adds a great pop of color to the gift box. 


I also used the "Tattered Blooms die" to make a flower. Be sure to layer your petals using pop dots to give it more dimension. And add a "sparkle dot" to the center of your flower for a little shine.

I stamped the sentiment using the new "Rock Notes" stamp set. 
I also used the "Journey Rectangles" die on the greeting. Using a mini clothespin and "Journey Twine" adds an extra added touch.

Be sure to check out the brand new catalog! There are loads of fun products inside! 


Supplies:
Dies: tattered blooms, journey rectangles
Paper: Going Places Prints
Stamp: Rock Notes
Misc: sparkle drops, mini clothespin, journey twine

Weekends are for Crafting with SRM

Saturday, July 18, 2015

Since I do a lot of crafting during the weekend, I wanted to start a new series here on my blog called "Weekends are for Crafting"

Each Saturday I will feature a variety of craft products and project ideas for you to try.

Let's get started with today's feature. It's all about SRM Stickers. They sell more than just stickers. I want to highlight two of their fun products for you today - the Bistro Chalk Markers and the Fabric Bags.


I made a little party favor bag using the 3" x 5" rustic linen bag. The neutral color is perfect because it will coordinate with any color combination.

I love the white bistro chalk marker. It writes smooth and wipes off clean if you make a mistake. It would be a hit at a party or wedding too. You can have your guests write their own greeting on a chalkboard tag. Fun!


I will definitely be using the chalk markers in my classroom. I'm already thinking of fun ways that my students can use them.

If you like these products be sure to stop by the SRM Store. They have loads of new stuff!

What are you making this weekend? And see you next week for "Weekends are for Crafting"

Project Life - Using the App

Thursday, July 16, 2015

I am a "make it quick" kind of scrapbooker. I don't like sitting for hours thinking about where to place my photos and embellishments. 

I also love technology and use apps often. That's why I love the Project Life app. Becky Higgins is genius for coming up with this concept. 


Here are a couple of my new pages!


Rachel and I hit the open road and headed to Austin, Texas last week. It was great to scrapbook on the go and preserve our memories. 

I used the "Let's Get Away" kit to make this page. It has the perfect travel themed PL cards too. I quickly made this using my I-Phone. Easy!

I made this next page just for fun! It's dedicated to my foodie obsession! Yes, I am one of those people that takes pics of my food. It's fun!


I used a couple of kits for this one. You can easily mix and match designs in the app. It's also easy to add journaling. 

And yes, there are print options available. You can order prints directly in the Project Life AppYou can order in 8" x 8" or 12" x 12" sizes. The pages easily fit into a photo sleeve and your album.


Persnickety Prints and Costco are also great to use. I have used Persnickety quite often and love the quality. Their 12" x 12" prints are only $1.99 too. 

Here's a look from their website so you can see for yourself.


My albums are mixed with traditional PL pages and ones made in the app. I love using both!

Have you tried the app yet?

The Summer Popsicle Card Project

Tuesday, July 14, 2015

It's super hot and humid here in Texas! My handmade card is just the perfect treat to cool things off!

And I used some great products from Fun Stampers Journey too!


I just love the "Hello Scoop" stamp set. Included in this set is a popsicle stamp and sentiments that are perfect for summertime themed cards.

The mixture of the cardstock, a banner, and sequins really brighten things up when set against the oatmeal cookie card base.


This would be fun to make with the kiddos if you are hosting a popsicle or icecream party too.

You can also make your summer table decor more festive by making cards for your guests and placing a bucket of popsicles next to them.

FSJ has a new catalog and loads of fun products. Be sure to check them out!


Supplies:
Stamps: Hello Scoop
Ink: black licorice, catalina splash
Cardstock: oatmeal cookie, pineapple smoothie, cool pool
Dies: journey ovals, journey circles, pennants
Misc: journey twine, journey sequins, mini wooden clothespins

Marquee Letter Love

Thursday, July 9, 2015

I just love marquee letters! They are on my must have list for party decor! I've been eyeing the Heidi Swapp letters for a long time. I finally dressed one up!

Here's a photo of it in action in my craft room!


Each one comes with instructions that are easy to follow. You would need to purchase paint, glitter, or washi tape to decorate your letter.

I really love the silver polka-dotted washi tape. It looks fab on my letter.

I can't wait to use this for party decor! They are so fun and festive for just about every occasion!


Have you purchased any of the letters? I'd love to see what you've done with yours!

A Blooming Birthday Card

Tuesday, July 7, 2015

Forget about the cake! Flowers and birthdays go so well together too! I can prove it with my latest creation.


I just love the die that I used to make this card. It's called "Journey Bloom Flowers" and it's from Fun Stampers Journey!

I layered several together and made it the focal point of my card. And that Oatmeal Cookie cardstock and Beach Ball ink really coordinate well together.

I must make more of these to have on hand for quick and easy birthday gifting!

If you'd like to purchase products be sure to check out the FSJ website for more info!


Fun Stampers Journey Supplies:
Ink - beach ball
cardstock: white, oatmeal cookie
dies - journey bloom flowers
stamp - journey blooms
pierced rectangle?
stamp : yummy party

DIY Burlap Gift Bags

Thursday, July 2, 2015


Burlap always gets a thumbs up from me! It's such a great material to use when making your own DIY gift bags! They are just the right size and sturdy enough to hold just about anything.

I whipped up some bags this week using products from Xyron and pretty paper from Simple Stories.

And these fab burlap bags are from SRM Stickers!


Here are some  friendly tips when using the new Xyron Creative Station!

- It's great to use for adding adhesive to your doilies. Once you run it through, just remove the top film and add it to your project.

- The Xyron adhesive sticks well to strong material such as burlap and fabric too!


I always have the Xyron 3" Sticker Maker on hand! It's great to use with die cut elements that come with your paper pack!


And here is the paper that I used. The "So Fancy" collection is perfect for girly gift bags!


I hope you guys caught the HSN craft day broadcast yesterday! Xyron featured a lot of fun ideas for using their products!

Supplies:
Xyron Creative Station
Xyron 3" Sticker Maker
Simple Stories - "So Fancy"
SRM Stickers Burlap Bag
Doily: Michael's Craft Store
Paper Straw: American Crafts
COPYRIGHT COKIE POP PAPER ・POWERED BY BLOGGER