A Puppy Dog Christmas!

Tuesday, November 30, 2010


I was day dreaming of cute puppy dogs as I sat and made some of my Christmas cards this year!

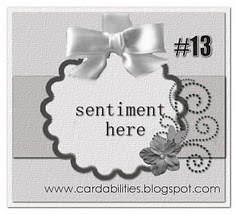
And....I got to use this cute Cardabilities sketch as part of the Tuesday Takes at Sketches in Thyme! Please join the rest of our talented Card Mavens as we have fun playing along with this week's AWESOME challenge.
Remember...you can use any style for your card just as long as you follow the sketch. And there's a wonderful prize up for grabs. The wonderful Delicious Doodles is offering three yummy digi images to this weeks' winner. I used the Poinsettia Corner digi image and colored it in red. I cut it out to make it pop up more on my card.

Don't you just love these Martha Stewart dimentional stickers?
I used them all over the card.

I also recycled once again with this card.
The puppy image is from an old gift bag that I had lying around. :)

To join in on the challenge and see the work of the TALENTED DT please click Here! Can't wait to see what you make this week!

Card Supplies
Puppy Image (from recycled gift bag); Cardstock - White (Stampin Up!); Paper - Art Warehouse - Red Star Die-cut (Creative Imaginations); Dimensional Stickers - Holiday (Martha Stewart); Ribbon - Red (Celebrate It!)

A Peaceful Kind of Layout & Blog Hop Winner

Sunday, November 28, 2010


I'm working on an a scrappy album just for ME! It will be full of things fun things about me plus things that I hold dear to my heart.

"Peace" is one of the things in this world that is important to me. No matter what stresses I have in life I know that God will lead me back to Peace. Here's the layout that I worked on today. I used the cute sketch at Sketchy Thursdays for the design.

I added a mixture of products and textures including chipboard, crinkled ribbon, dimensional stickers, and a pretty Prima flower.

 
I even journaled on this one by typing out my favorite scripture about "Peace". I was inspired to add this after seeing the Kingdom of God challenge doing on over at  My Paper Treehouse. Nana has some very inspirational challenges going on over there so I hope you check them out. 

Also, instead of adding a traditional banner I added crinkle ribbon and topped it off with chipboard embellies.

I've got more layouts planned for this album. Can't wait to start working on them. I hope you all have a very PEACEFUL day!

And before I leave...the WINNER of my PCS Blog Hop Prize is...BONNIE C.  

A Scrap Above said...


Hi Angi~


I love this idea! Beautiful projects, I love all the festive colors/papers you used. My all time favorite Thanksgiving memory(and I have many) would be when I was little, we would head to Hubbard TX to my Granny & Pa's, ALL the family would be there,the moms cookin', dads watching TV, kids all running around the country just waiting on the FOOD... Sure miss those times. TFS and a chance to win.
(Please email me at cokiepop [at] yahoo [dot] com so that I can mail you your Teresa Collins Chipboard "Giving Thanks" album kit).
Layout Supplies
Kraft cardstock - Bazzill; Patterned Paper: My Mind's Eye - Pretty Please "Flower Drops"; Dimensional Stickers and Chipboard: American Crafts - Etiquette; Crinkle Ribbon: American Crafts; Puffy Alpha Letters: Making Memories; Flower: Prima.

"Thank You" For A Cause!

Saturday, November 27, 2010

I hope everyone had a wonderful Thanksgiving. I'm still super stuffed from all of the goodies that I ate for the past 2 days! I didn't want to deal with the hassle of Black Friday so I stayed in and had my own crafty day. Besides....I'd rather wait for Cyber Monday when I can shop online and not fight all the madness of the crowds. :)

Here's one of the cards I made today! This one is for the "Thank You" Card Cause that super sweet Julie has going on over at These Are a Few of My Favorite Things. I hope you all join in to help out two wonderful people in need. You can read about it HERE. Julie is also hosting a challenge at Do More With Less. I'm playing along there too. :)

I needed an idea for the layout of this card so I used Laura's cute sketch over at 2 Sketches for You.

And if you like to work with sketches - Sketches in Thyme is doing an "Open Sketch Challenge". Use any card or layout sketch and join in on the fun!

I sure had loads of fun with this MME So Sophie patterned paper. I used it behind the owl, for the scallops, and to spell out the word "Thanks". Multiple uses for patterned paper...Love it!

I had fun mixing old and new supplies. I love this MME Alphabet Soup chipboard. I cleaned my scrap room today and found a huge stack of kraft cardstock and a bucket of shimmery ribbon that was just sitting there collecting dust. I decided to add these to the card as well.
I also wanted to let you know that I started a Facebook account for my crafts and blog. If you are also on FB please leave your info in the comments section. I'd love to check you out. You can find me on FB by clicking HERE!

I hope you all enjoy your weekend!


Card Recipe:
Kraft Cardstock: Stampin Up; Owl & Key Chipboard: MME - Alphabet Soup; Patterned Paper: MME - Savvy "Never Enough" All Together Alpha Paper; Shimmer Ribbon: American Crafts

Sketches in Thyme Card Challenge Fun!

Tuesday, November 23, 2010


I wanted to take the time to wish everyone a Very Blessed Thanksgiving. Now it's time for some card fun!

Woo Hoo! Today is a great day for all of you card makers out there. Today is the first ever Sketches in Thyme Card Challenge.

Sketches in Thyme will have a new "Tuesday Takes" Card Challenge posted every Tuesday. For our first challenge we have a fun sketch for you. (you Don't have to use digi's to play along!)
I wanted to keep an artistic feel to the beautiful image. I printed it out in light brown ink. I also added a Prima flower since it matched the patterned paper so well.

I used a sentiment from a 12 x 12 sheet of patterned paper that I had in my stash. The sentiment is so perfect for this time of year!

We are sponsored this month by the wonderful Delicious Doodles. The monthly winner will get a choice of 3 digi images. How fab is that?

For our Card Challenges, we will have a "Weekly Winner" and a "Top 3". These winners will get a blinkie to proudly display on their blogs. With every challenge, participants will receive an entry for the monthly prize. So if you play all four weeks, you will get your name in the drawing four times.

Remember, you don't have to use digi's on your card creation. You can use any elements as long as it follows the sketch.
So what are you waiting for? Hop on over to our 1st Sketches in Thyme Card Challenge and join in on the fun!

Card Supplies:
Cardstock: Stampin Up; Patterned Paper: Teresa Collins - Giving Thanks and My Mind's Eye - Lost & Found Union Square "Beautiful Day"; Flower - Prima; Sentiment Paper - from stash; Ribbon - American Crafts - Letterbox Ribbon Card "Greeting"

Santa & Rudy love Glue Dots!

Monday, November 22, 2010

I've got so many crafty ideas bouncing around in my head right now, so from now until the end of the year please join me for "5 Days of Crafty Fun with Glue Dots".

The crafty days will be posted from now until the end of the year. I won't just post Christmas projects. I've got a variety of projects to show you how much fun you can have with Glue Dots® products. The next one will be posted on December 3rd. :)

Let's get started ...

This project was easy peasy and a lot of fun. It's an Altered Christmas Canvas. I gave it the fun title of "Santa & Rudy"!

1. Please grab 2 recycled products from Christmas last year. I chose a gift bag that had this adorable Rudolph face embellishment on it. I also cut out the Santa from leftover Christmas patterned paper from last year. To make the Rudolph face pop up you can add a spring like this one to the back. They are sold at your local craft store. Or snag one from a gift bag lying around the house.

2. We will be decorating stretched canvas. I used a 9" x 12" sized canvas. Cut your patterned paper to fit the dimensions of your canvas. I used Glue Dots Lines® on the border of my paper to adhere it down to the canvas. Here's a shot of the side of the project. See how well the Glue Dots Lines® keeps the paper nice and flat against the canvas?
3. I then used Glue Dots Pop-Ups® to adhere the Santa cut-out on top of the patterned paper.

4. Tie a colorful red ribbon around your canvas.
5. I then adhered the Rudolph to the bottom left of my canvas using Glue Dots Pop Ups®. They are sturdy enough to hold the spring in place.
6. Finish your project by adding shiny lettering and a fun title.
7. Tada....your Christmas canvas is complete. Here's how it looks once it's all done. You can decorate a Christmas canvas any way you like. Just have fun with it.
8. Once you are done place it on a fireplace mantle, a bookshelf, a desk, or give it as a gift.

I hope you enjoyed this fun Glue Dots® Project. For more fun please join Glue Dots® on Facebook.
*I wrote this blog post while participating on the Glue Dots Design Team.

Project Supplies:
Canvas: Black Studio; Patterned Paper: Reminisce - St. Nick and Stampin Up - Candy Cane Christmas; Rudolph Face: from gift bag; Foil letter stickers: American Crafts Thickers; Ribbon: Create It; Adhesive: Glue Dots® and Glue Dots Pop Ups® .

Papercraft Star Thanksgiving Blog Hop!

Sunday, November 21, 2010

Welcome to the First Annual Papercraft Star Thanksgiving Blog Hop Week sponsored by My Favorite Things. Our Designers have come together to celebrate this special holiday by creating projects inspired by Thanksgiving and all that we are thankful for in our lives, including you!

We are so happy you could join us for this special event! You should have arrived to my blog from Liz's blog, if that is not where you arrived from, then please join us at Papercraft Star to start the hop from the beginning so you don't miss a thing! You must be a follower of Papercraft Star, visit all the blogs and comment in order to be entered to win our fantastic Grand Prize!

During this special week of Thanksgiving we hope that you'll find a wealth of inspiration among the beautiful projects our Designers have created especially for you! To add to the fun, we've got fabulous prizes along the way at many of our Designer's blogs and you'll be entered to win our fantastic $25.00 Gift Certificate by our generous sponsor My Favorite Things, if you visit every blog and leave a comment with all of our Designers! You have until midnight (Eastern Time) on Saturday November 27, 2010 to leave all your comments and be entered to win the Grand Prize. We'll draw the winners of the prizes and announce them beginning Sunday November 28, 2010.

My Thanksgiving project is "Give Thanks" Turkey placecards and Autumn potpourri. These are perfect to use in decorating your table. I have also placed them all around my living room. 

I love to buy the small plastic container of flowers from my LSS. I got these in Autumn colors and lightly coated each flower with Bath & Body Works Autumn Apple Home Fragrance Oil. The scent is of autumn apples with pear blossoms and a hint of applewood. Wonderful smells for the holidays. I love to do this to get the family in the mood for Thanksgiving.   
This little card can be used for decor or as place settings. I added patterned paper from and "Give Thanks" ribbon from The Paper Studio to each of these. I actually recycled the turkey from a greeting card that I received. I love to recycle cards and make projects with them.
I have a special Thanksgiving prize to offer during this fun hop. It's the Teresa Collins Chipboard "Giving Thanks" album kit. It is filled with thoughts of thankfulness and gratitude. It includes: 12” x 12” double sided papers, die cut cardstock tags, One package of ribbon, Two chipboard book covers and four metal binding rings, Full color instructions, and more. The winner will be selected on November 28th. Good Luck!

Here's how to win:
1. Leave a comment telling me about your favorite Thanksgiving memory.
2. If you like my blog you can also click (above left) to "follow" my blog. (2 entries for followers) :)

Happy Thanksgiving to you and yours and thank you again for joining us for the Papercraft Star Thanksgiving Week Blog Hop, your next stop on the hop is Kimberly's blog. Happy Hopping!

Little Man Tate!

Saturday, November 20, 2010


My sister Nicole (a.k.a. Cokie) has the cutest fur baby. Meet little Tate!

He's a little spitfire but will surely melt your heart if you ever met him. I'm making an album for my sis for Christmas. This is just one of the new layouts that I just completed tonight. I had so much fun making this one.

My brain is way tired from teaching all week so I enlisted the help of the Get Picky challenge to help me with the layout. I used their cute sketch!
Tate is such a character. When I took these photos of him, he actually posed for the camera. Doesn't it look like he's smiling in these photos? And I was so excited to find a Shih Tzu embellie (from Jolee's Boutique) that looked just like him. :)
Another fun thing about this layout....I cut out this dog face from The Paper Studio patterned paper. I love the size of it and it fits in so well with the doggy theme. I also used foil A.C. Thickers to spell out Tate's name.

One of Nicole's fur babies passed away a couple of weeks ago. We miss little Nick soooo much! I am going to have a page dedicated to him really soon too. He was the sweetest.

Come back this weekend for another layout! (yes I've actually made layouts....LOL)

Layout Supplies:
Patterned paper: The Paper Studio; Cardstock: Stampin Up; Dimensional Stickers: Jolee's Boutique & The Paper Studio; Foil letter stickers: American Crafts Thickers.

It's Time to Relax!

Wednesday, November 17, 2010


Happy Wednesday everyone! I wanted to show you my latest card. This one is simply titled - "Relax".

I made this one for a teacher friend of mine. Teachers are under so much stress these days. Thank God we have some time off next week for Thanksgiving. We need it and DESERVE IT!

I got to play with a fun stamp set after winning it from Erin Schlosser and her company Schlosser Designs. Thank you Erin! I have had so much fun playing with them. The chair & the "relax" sentiment are from the "Furnishing Fun" stamp set.

I love to draw from inspiration for my cards.
The inspiration for this one came from the Etsy Inspired Challenge and Happy Day Designs.

I love this Bold Red necklace from their shop!

I added other fun elements to the card.
I really like the red glittered bird, the pom trim, and the stick pens.

I hope you all take some time to "Relax" next week during the Thanksgiving Holiday! ;-)
Card Supplies:
Kraft Cardstock - Bazzill; Patterned Paper - from stash ; Stamp - Schlosser Designs: Furnishing Fun; Glitter Chipboard Bird - My Mind's Eye: I Believe; Pom trim - My Mind's Eye; Stick Pins - Jillibean Soup: Sugar Picks; Ribbon - Celebrate It; Ink - Stampin Up

My Christmas Wish List!

Monday, November 15, 2010


Seasons are changing and the weather is getting a bit cooler here in Texas. I don't like cold weather at all, but I do love the Christmas decor popping up all around town.

Here's my 1st Christmas card of the season!
I'm going to make 15 more handmade cards (all with different designs). Hope you like my first one. :-)

Do you like my fancy ribbon design? I wanted to do something special to the ribbon instead of laying it flat on the card.

I also mixed patterned paper, with a splash of canvas (the tag & star), and a dash of chipboard (the tree and journaling tag) on this one. Instead of journaling on the chipboard tag...I laid the tree and star on top to frame it. I always want to try and use my supplies in different ways ;-)


Challenge:
Wee Memories - Challenge 31 - Patterned Paper


Card Recipe:
Cardstock: Stampin Up; Canvas Tag: ; Canvas Star: Jillibean Soup; Chipboard: My Mind's Eye - I Believe collection; Patterned Paper: Stampin Up - Candy Cane Christmas; Ribbon: Celebrate It

COPYRIGHT COKIE POP PAPER ・POWERED BY BLOGGER