Showing posts with label She's a Sassy Lady. Show all posts

Catching Up, Giveaway Winner, and More!

Thursday, September 9, 2010


I actually took the week off from blogging so that I could enjoy some time with family and catch up at school. Hope all of you had a Blessed Labor Day and a great week!

I'm playing catch up now so here are all of the announcements this week - First I want to announce the winner of my Build-A-Bear Giveaway. Sorry for the delay. I had people enter from this blog and
my  Stampin Up blog. Thanks so much for "Subscribing" to my S.U. Blog. You can now "Follow" there too if you'd like. To visit click HERE
Andrea is the Build-A-Bear winner. She subscribed last month. Thanks Andrea and please email me your mailing info.
Please come back on Sunday as I will have a sneak peek of The Paper Variety Blog project to kick off our brand new challenge. To visit the challenge blog click HERE

Then on Monday starts a week of ALL NEW projects and we will kick off the Fantabulous Cricut Button Up for School Blog Hop.


I'll also have a Guest Designer project that I'm working on for the She's a Sassy Lady blog.

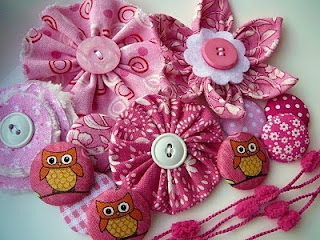
Plus I'll be doing another GIVEAWAY for some cool stuff from a great company called Purple Pumpkin. I'm giving away 2 prize packs. This is just a sneak peek at some of the cool stuff I'll be giving away from their site. 


You don't want to miss it. Don't forget to join me beginning on Sunday to begin a week full of Crafty Fun!

Angi

Sassy Paper Bag Album Tutorial!

Wednesday, August 4, 2010


I am the Guest Designer today over on the  She's a Sassy Lady blog. My August tutorial project today is a "Sassy Paper Bag Album"! I love to make altered projects so this one was fun for me.

Materials You will need:
  • 3 Paper bags
  • Hole Puncher
  • Ribbon, eyelets, book rings, or fibers
  • Your favorite pattern paper
  • A bunch of your favorite embellishments
First lay your paper bags on top of each other. Make sure that the middle bag is going the opposite way of the first and the last bag. Adhere your bags together. You can adhere them using stitching, brads, staples or eyelets. I love to stitch/sew them together for better durability.
Here's a close-up picture of the stitching and the holes that I punched. I punch from the outside going in so that I can gauge a good distance between each hole to keep it even.
I also love the ready made built-in pockets that are formed when you put your paper bag album together. These pockets are great for storing mementos, cute tags, journal blocks, or any other keepsake.
Here's the paper bag album after it's put together and ready to decorate. Now it's time to make your pages. 
With your paper trimmer cut enough patterned paper to cover each page. I cut each paper piece at 5" x 5.5".
Adhere each of your papers to the front cover and each page of your album.  Also make sure to cut and adhere some photo mats or pockets to store journal tags. You can also ink the sides to make the mats stand out.
 This is how one of my pages looks with journaling tags. 
I made the pocket to hold the journal tags with patterned paper. 
Now it's time to embellish. I used various embellies from Me & My Big Ideas.
 I add my ribbon last after I make sure all of my patterned paper and embellishments are sturdy and secure. Add different color and textured ribbon to make it more colorful.
Decorate your pages any way you want. It's best to use coordinating papers that match well together. I used paper from a ColorBok kit so that all the papers would go well together.
Here are 2 of my pages in a side by side view.

 I will show more pages of this album soon once I get the video tutorial finished. If I post everything then this tutorial will be 2 or 3 web pages long. (smile)

I hope you enjoyed my tutorial today. Please be sure to check out the She's a Sassy Lady blog today for more wonderful tutorials. You can visit by clicking HERE

Disney Passport Fun!

Wednesday, July 7, 2010


 Today is my day to feature the tutorial over at the She's a Sassy Lady blog. This time the focus of today's project is on Disney. At my house - "We Love The Mouse"!

My two angels - Rebekah & Rachel love our trips to Disney World. My project today is called "Disney Passport Mania". Below are instructions to make your own passport.

These passports are great for:

1. Giving as a gift to someone that is going or just got back from Disney. You can even surprise someone by sticking airline tickets to Orlando and Disney park passes in them.
2. Great for holding your Disney mementos such as (park maps, tickets, brochures, etc.)
3. You can also stick this inside a page protector of your Disney album.

Now on to the project instructions:

First, grab an unused scrapbook that you have lying around and remove the white insert out of one of the page protector sleeves. These inserts are somewhat like thinner chipboard. They will serve as the base of our project.

Place your white insert flat on a table. I took this insert from an 8" x 8" album. With my paper trimmer, I cut a strip of red cardstock at 8" x 4". You can adjust this cut depending on what size album that you took your white insert from. Adhere the red strip to your white insert using a Zig pen or other adhesive. Make sure you only adhere the sides and bottom of your red strip. This will serve as our pocket so we need to leave room in the middle to place our Disney mementos in.

Next choose 3 of your favorite Disney patterned paper.

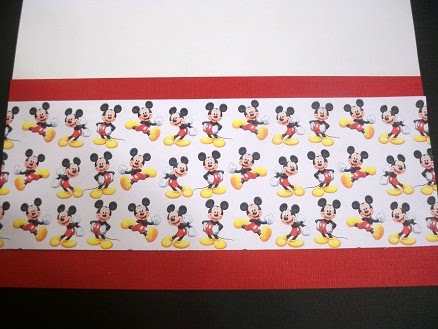
Now cut one of your favorite papers to make another strip. I cut mine at 8" x 3-3/4". Then center and adhere that paper on top of your red cardstock to look like this.
  

Pick your second favorite Disney patterned paper to cut the last strip. This time cut it at 8" x 2" and adhere it to the top of your white insert like this.
  

Now we need to type up a cute sentiment or journal spot that will fit the occasion. I typed this up about Rebekah & Rachel. Then I used my Zig pen and adhered it to the left side of my Disney passport. You can use any cute font that you like. If you are looking for cute fonts check out:
http://www.kevinandamanda.com/ 

 Now we need to make a Mickey face cut with the Cricut. For this I used the Disney Mickey Font cartridge and cut Mickey's face at 3". This cut can be found on pages 72 and 74.  I also added an "M" to the center of my Mickey Face to dress it up a bit. I then used adhesive to stick this next to the sentiment/journal spot on my passport.


We are almost done. Now we need to add some Disney mementos to our passport. You can stick anything into the red pocket such as Disney brochures, park tickets, park maps, airline tickets, etc.
  

To finish things off I wanted to add some ribbon. Either red or black ribbon would look great with this project. I decided to go with black sheer ribbon. I just wrapped it around my Disney passport and tied a bow in the center.
  

And once again here is the finished project
  

I hope that you enjoyed my Disney Passport tutorial. Please visit the She's a Sassy Lady blog. Sheila and the rest of the Sassy Divas have great tutorials there.

Have a Creative Day!
Angi

Challenges
Wee Memories - Free for All
Craftalicious Challenge - Cute

Paper Play - For a Child or Teen

Great News to Share!

Sunday, May 30, 2010

I hope everyone is having a Blessed Memorial Day Weekend!
I wanted to share some news.....I'm a Sassy Lady!  I will be one of the new designers with the She's a Sassy Lady blog! 


Our new format will contain a New Card Kit Giveaway each week followed by a new design every Tuesday, Wednesday, Thursday, and Friday!!! These designs will be brought to you by a wonderful group of designers. Please click here to visit She's a Sassy Lady. And thank you Sheila for this wonderful opportunity. I can't wait to work with all of the talented designers on the team!

Enjoy the rest of your weekend!
Angi
COPYRIGHT COKIE POP PAPER ・POWERED BY BLOGGER